Simple Component Inventories

Trent Walton • Sep 19, 2023
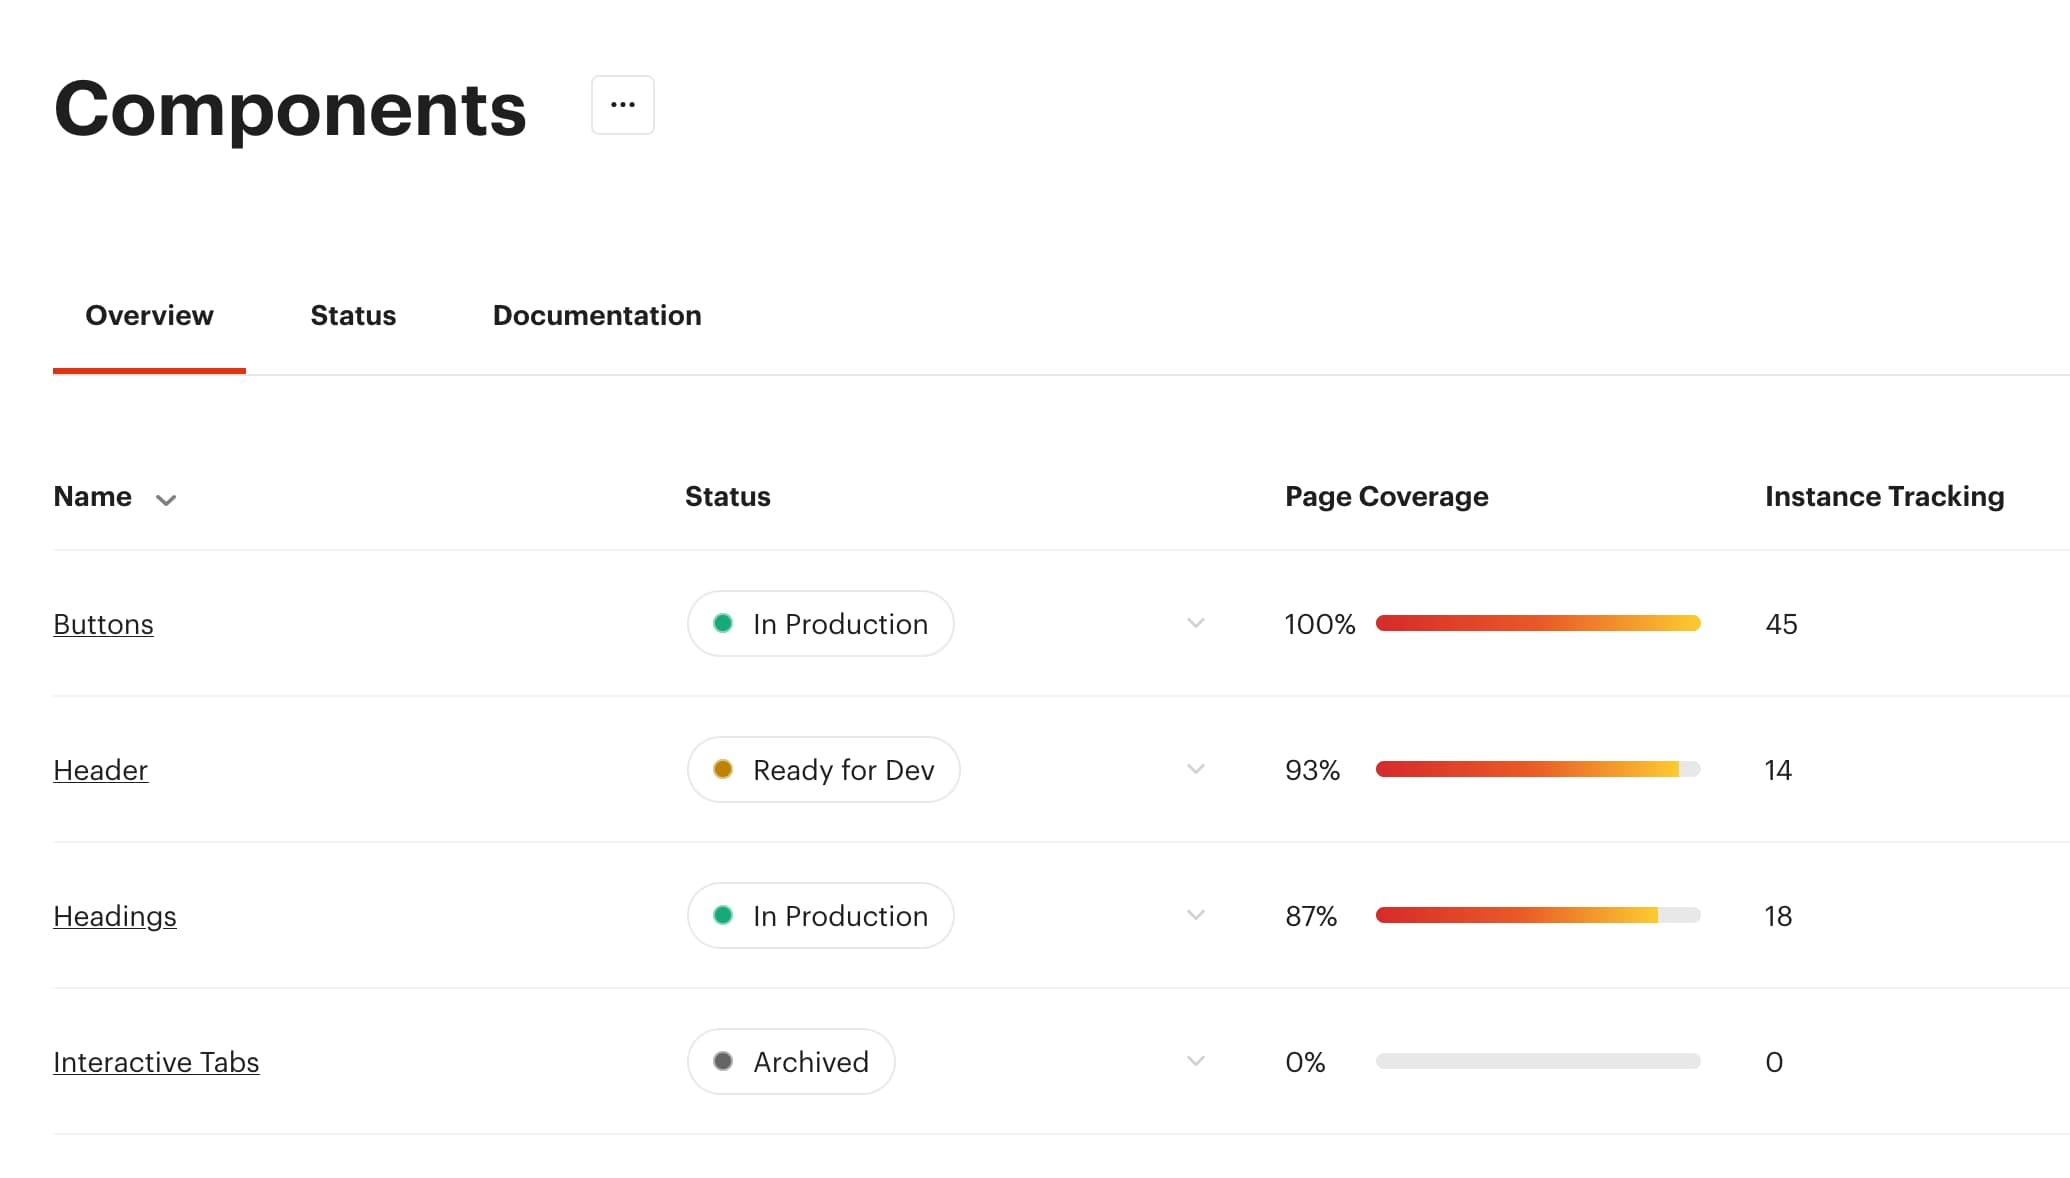
You don’t need a polished set of design system components to get a lot out of Luro. In addition to organizing research, testing, etc., or running performance and accessibility tests for your entire site, you can use Luro to automate the component/interface inventory process before the design process even begins.
Whether working with an existing design system or redesigning from the ground up, creating component inventories helps answer key questions like, “What components do I need to create to account for the entire product experience?” or “How many times is this component used throughout the product? Are there any incorrect implementations?”
It used to take me days to create these. I’d find another corner of a site I’d not yet clicked into and, with it, a slew of new use cases.
Now, I use Luro to streamline this process — often, it is a way to set up a design system before even designing components. Here are two ways I go about this:
1: Start in Luro with no components
- Grab your site or product’s URL (and login if applicable).
- Use Luro’s page crawler to import pages.
- Head to components and add a component you want to inventory manually
- Click into your component, click the tracking tab, and click Add Tracking.
- With your site as the reference, add CSS selectors for your components. You can use “Legacy CSS Selector” if you plan to replace the component with your redesign.
- Click Finish Editing and then Run crawl.
With the crawl complete, you have a page usage count and a count of individual instances. You can also select specific variants to get a list of every page the component appears on. This approach can be particularly helpful when it’s time to itemize tasks to ship your new component or design system.
2: Start in Figma with component screenshots
- Take screenshots of components you plan to redesign
- Add the screenshots to Figma, making each one a component. I don’t do any design at this point. I’m just using these as placeholders that I’ll eventually replace with new designs.
- Publish your components within Figma. Copy the share URL.
- Head to components in Luro and add a source file / import your components from Figma
- If you haven’t already, use Luro’s page crawler to import pages.
- Click into an individual component, click the tracking tab, and click Add tracking.
- With your site as the reference, add CSS selectors for your components. You can use “Legacy CSS Selector” if you plan to replace the component with your redesign.
- Click Finish Editing and then Run Crawl.
Not only does this approach help me understand where and how components are being used, but it also helps me organize my process. I’ve got all the components I need to design itemized. And even better (in a step I’ll cover more in-depth soon), I can also add the rest of my prep work: research, documentation, project setups, etc.